Free tickets let attendees register for your event at no cost. You can use them for complimentary access, staff passes, or events with no admission charge. No payment gateway is required for free ticket orders.
Go to Tickets → Manage Tickets and click Add New.

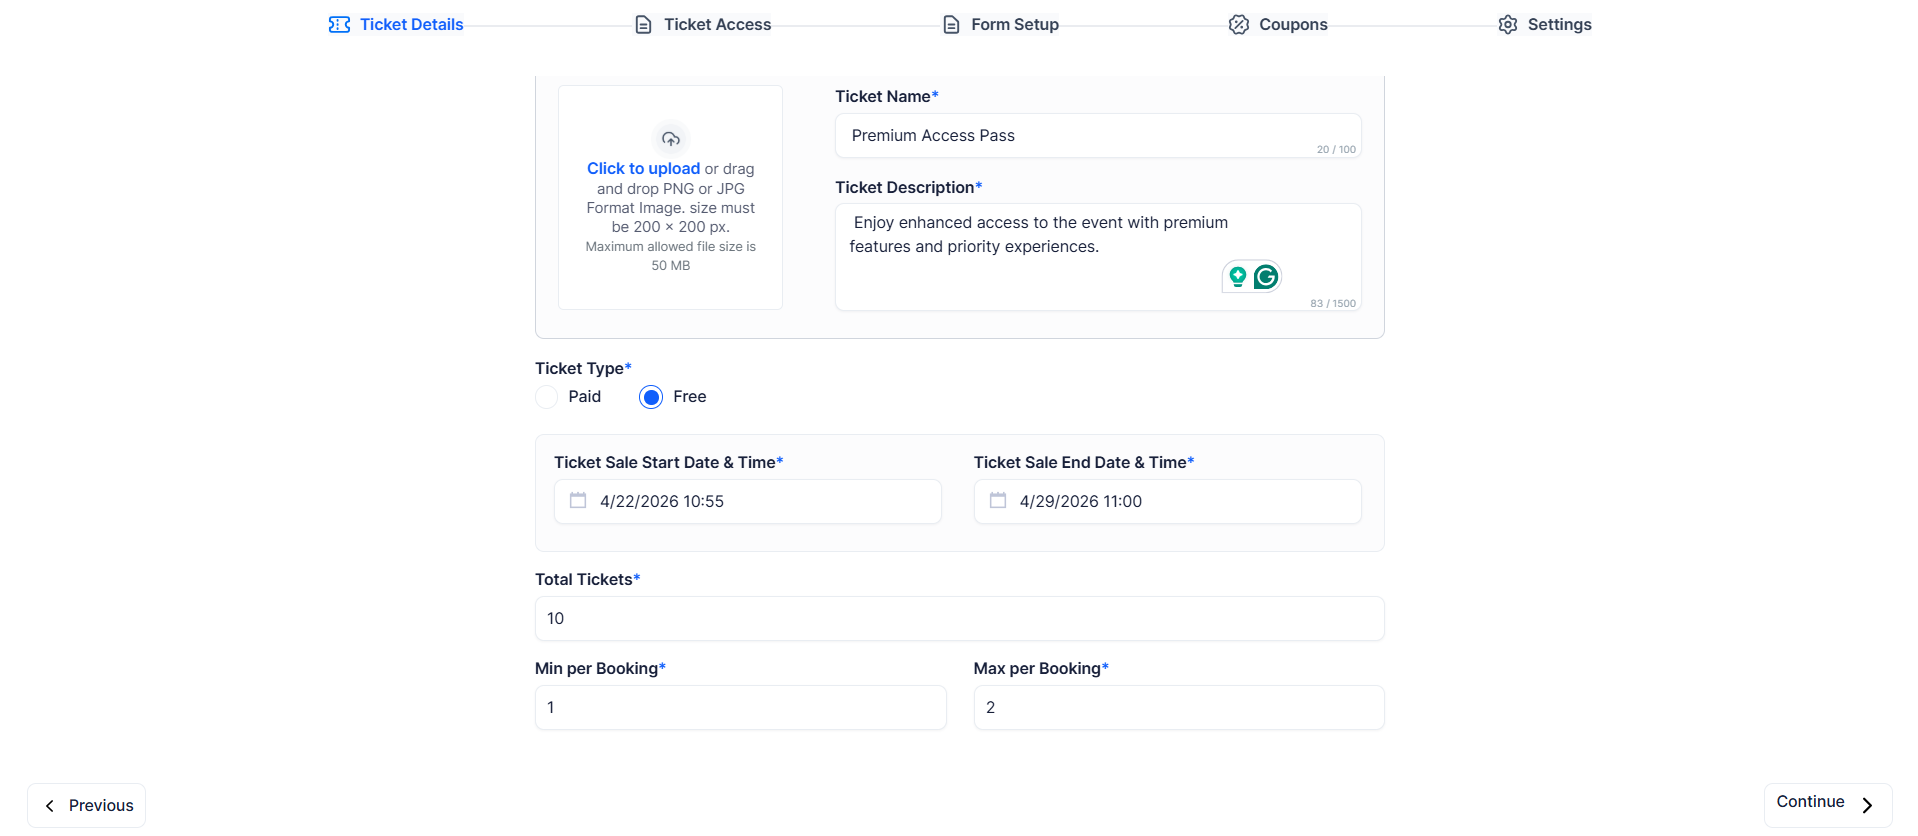
In the Ticket Type field, select Free.
The Price, Currency, Fee Setting, and Payment Method fields will disappear automatically — they are not applicable to free tickets.

The required fields are ticket name, ticket description, start date & time, end date & time, total tickets available, minimum per booking and maximum per booking
Navigate to the Ticket Access tab to define how this ticket interacts with sessions. You can choose :
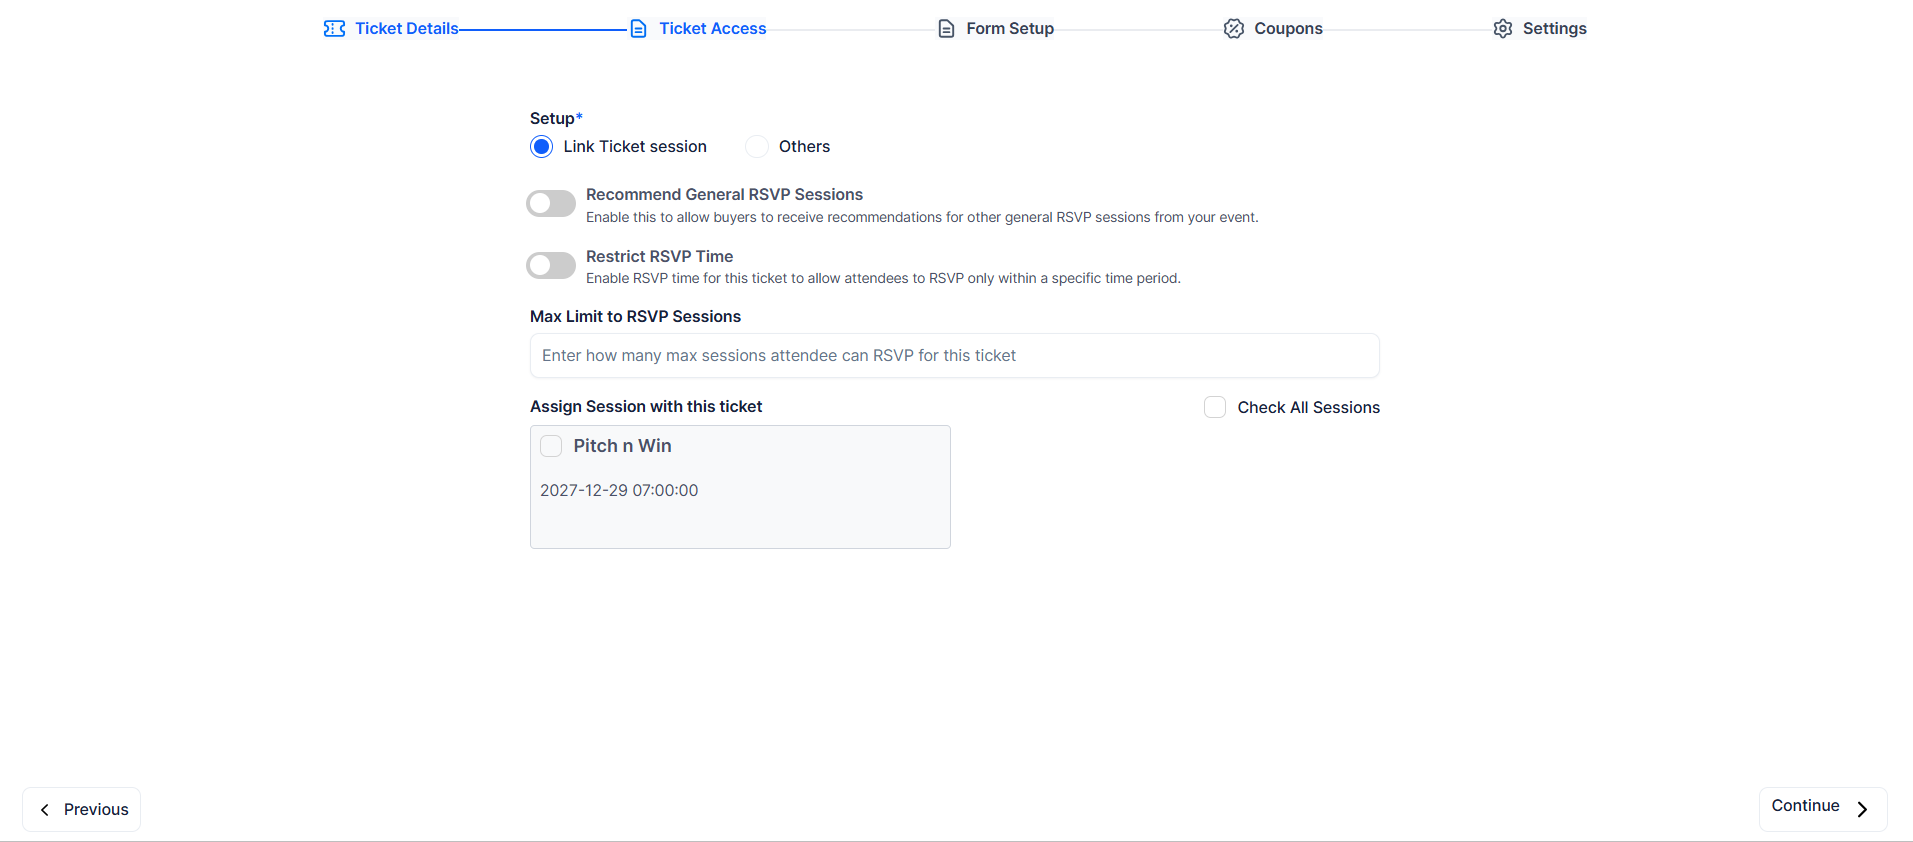
Optional settings include:
If you selected Link Ticket Session, you can assign sessions manually or use Check All Sessions to allow access to all available sessions.
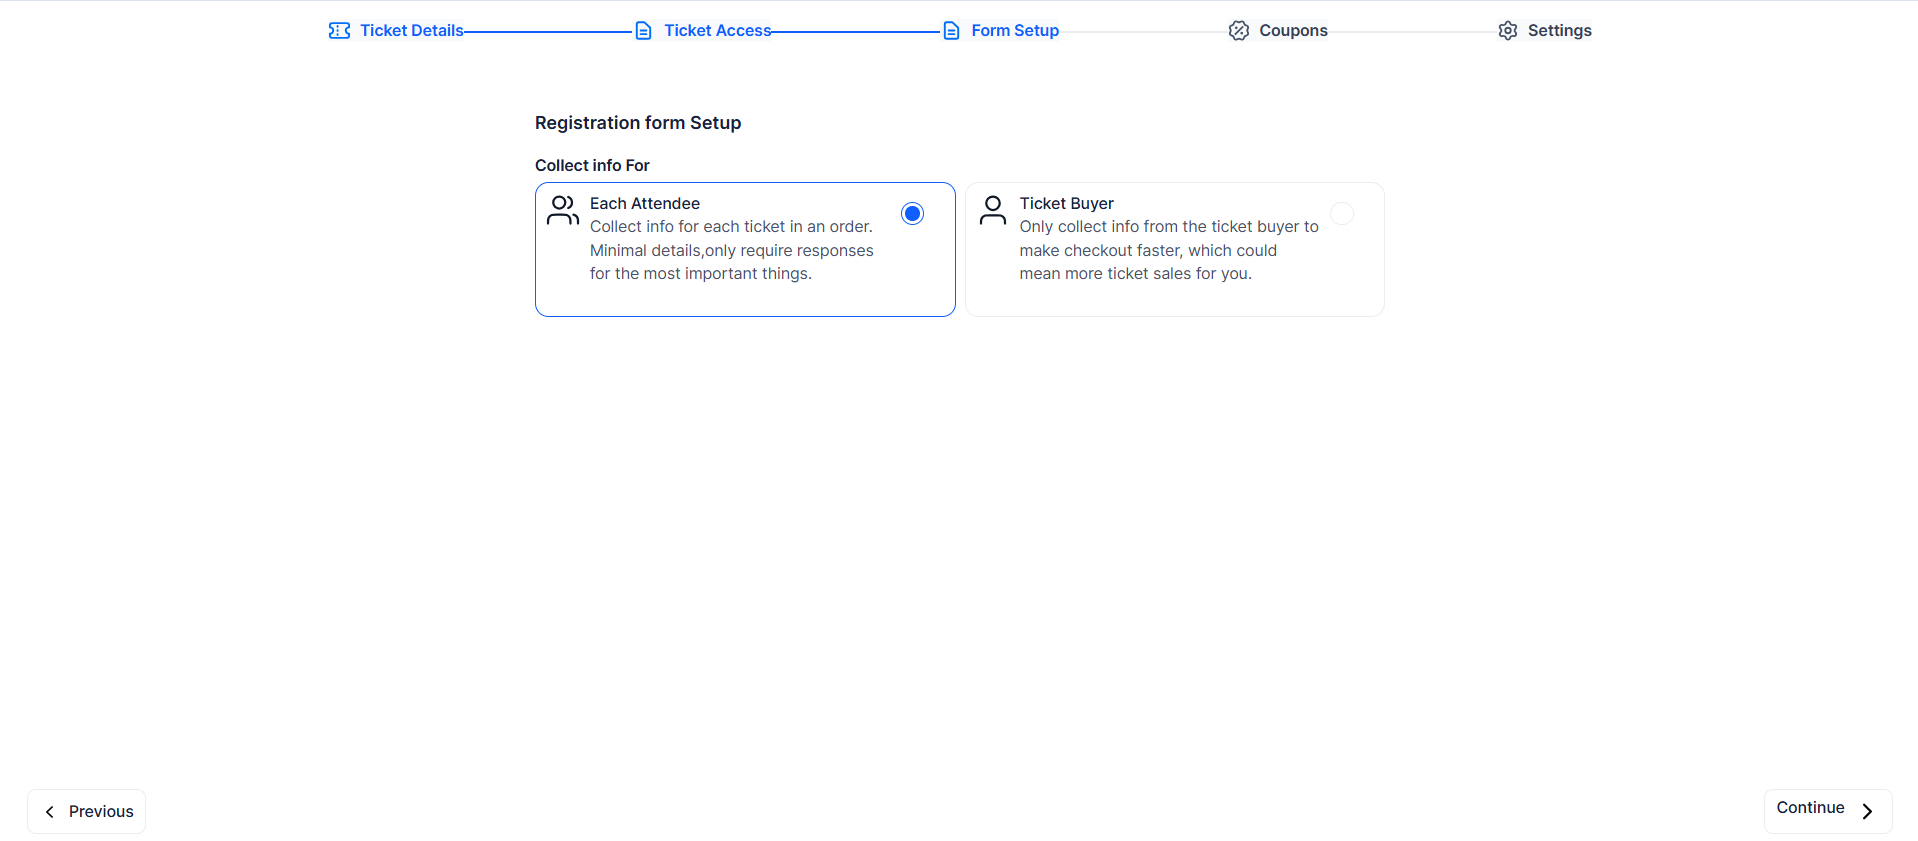
Go to the Form Setup tab and choose whether to collect information for Each Attendee (details for every ticket) or only the Ticket Buyer (details from the purchaser only), then click Continue.
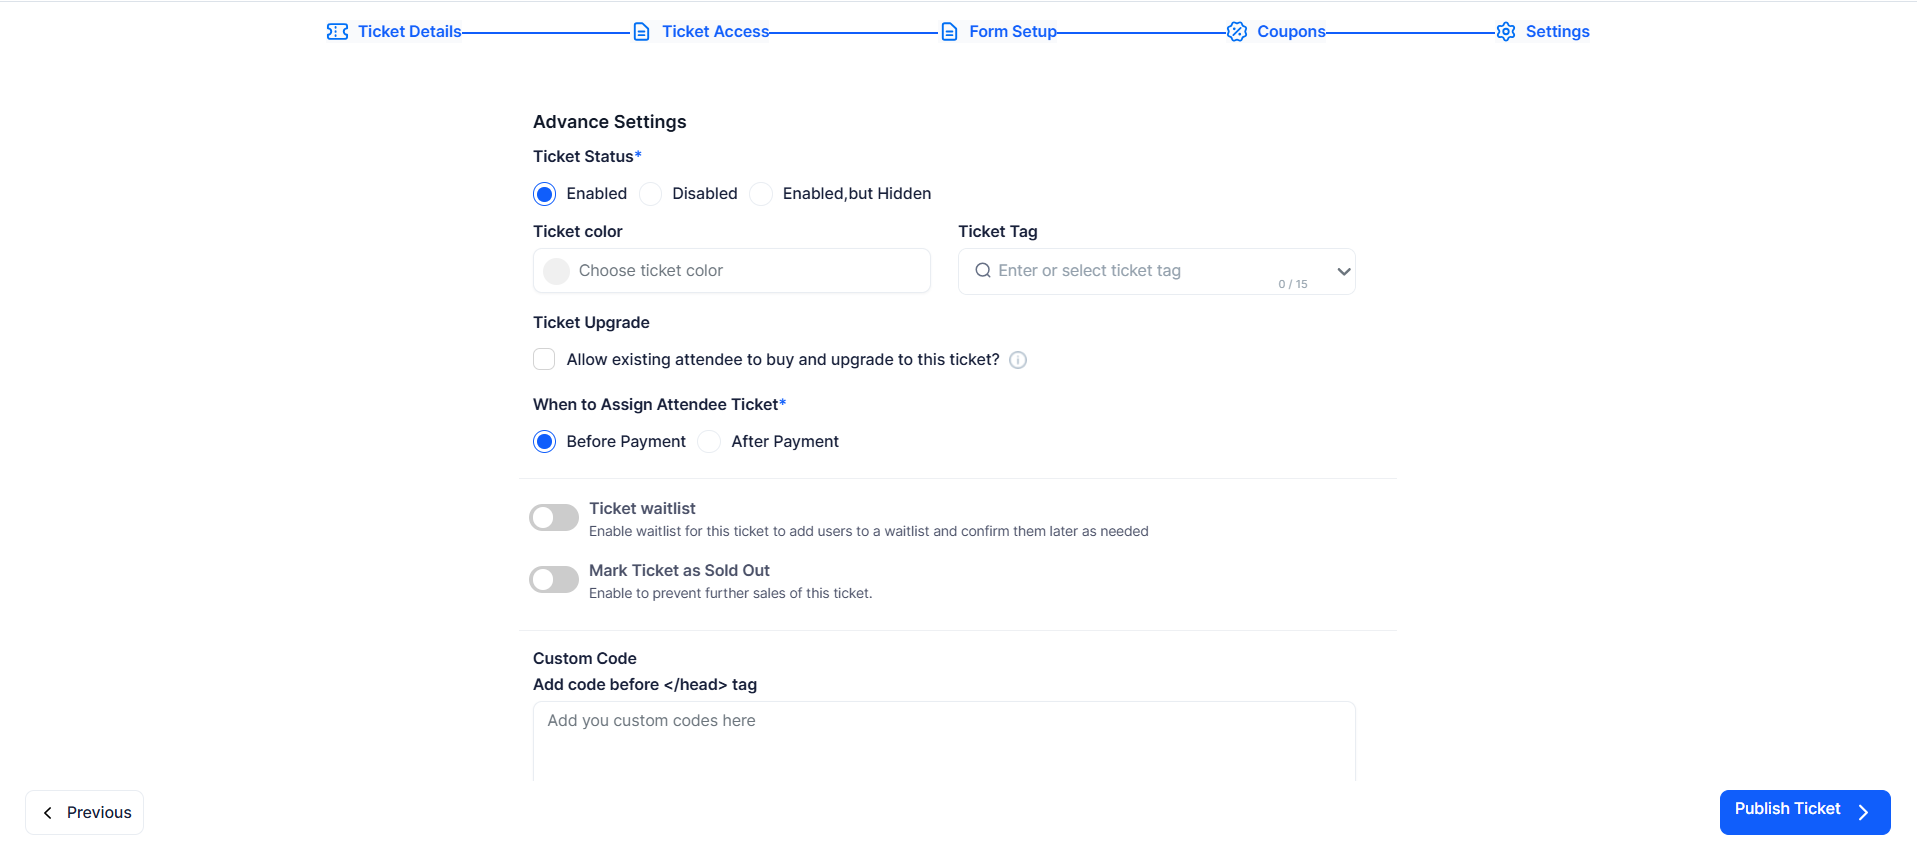
Go to the Settings tab and complete the required fields by setting Ticket Status to Enabled and selecting When to Assign Attendee Ticket (Before Payment or After Payment). For free tickets, either option can be selected as it does not affect the process since no payment is involved. Optional settings include Ticket Color, Ticket Tag, Ticket Upgrade, Waitlist, Mark as Sold Out, and Custom Code. Once done, click Publish Ticket to save and complete setup.
When an attendee selects a free ticket, they go through a simplified checkout process without any payment step. After submitting their details, the ticket is instantly confirmed and assigned to the attendee. A confirmation email may be sent depending on your event settings, and the ticket will appear in the attendee’s profile. Free ticket orders are recorded in the system just like paid orders, allowing you to track registrations, manage attendees, and monitor ticket availability.
