HOST's badge design feature allows event organizers to create personalized badges for attendees, enhancing event engagement and professionalism.
Here's a step-by-step guide to designing accurate badges:

Interactive Guide
Or check the step-by-step guide
1: Go to Registration > Badge Printing
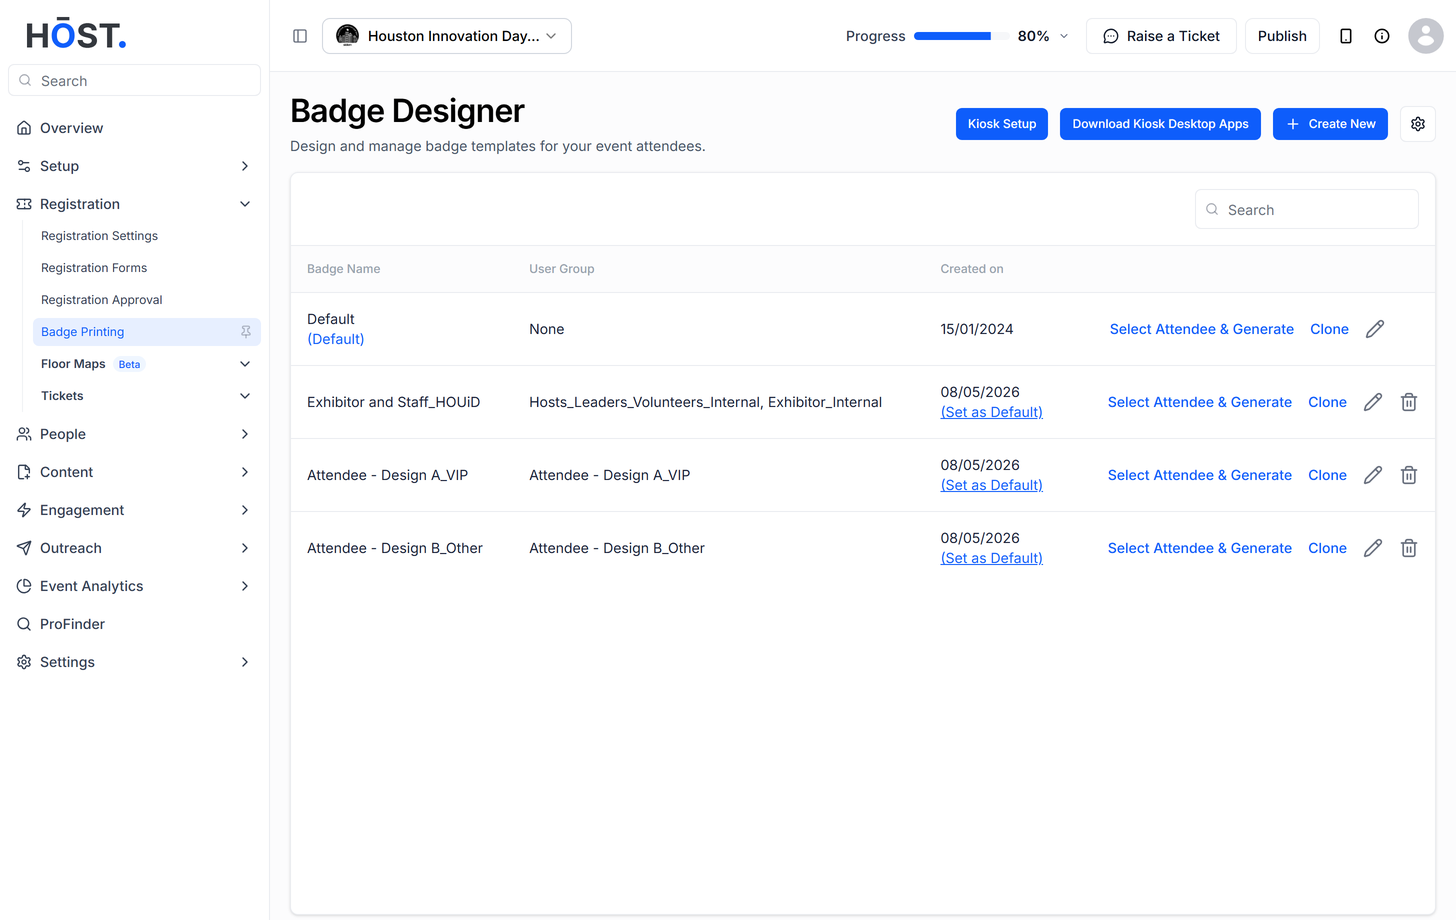
2: Edit a template or click "Create New"
3: Set the badge name, user group and size
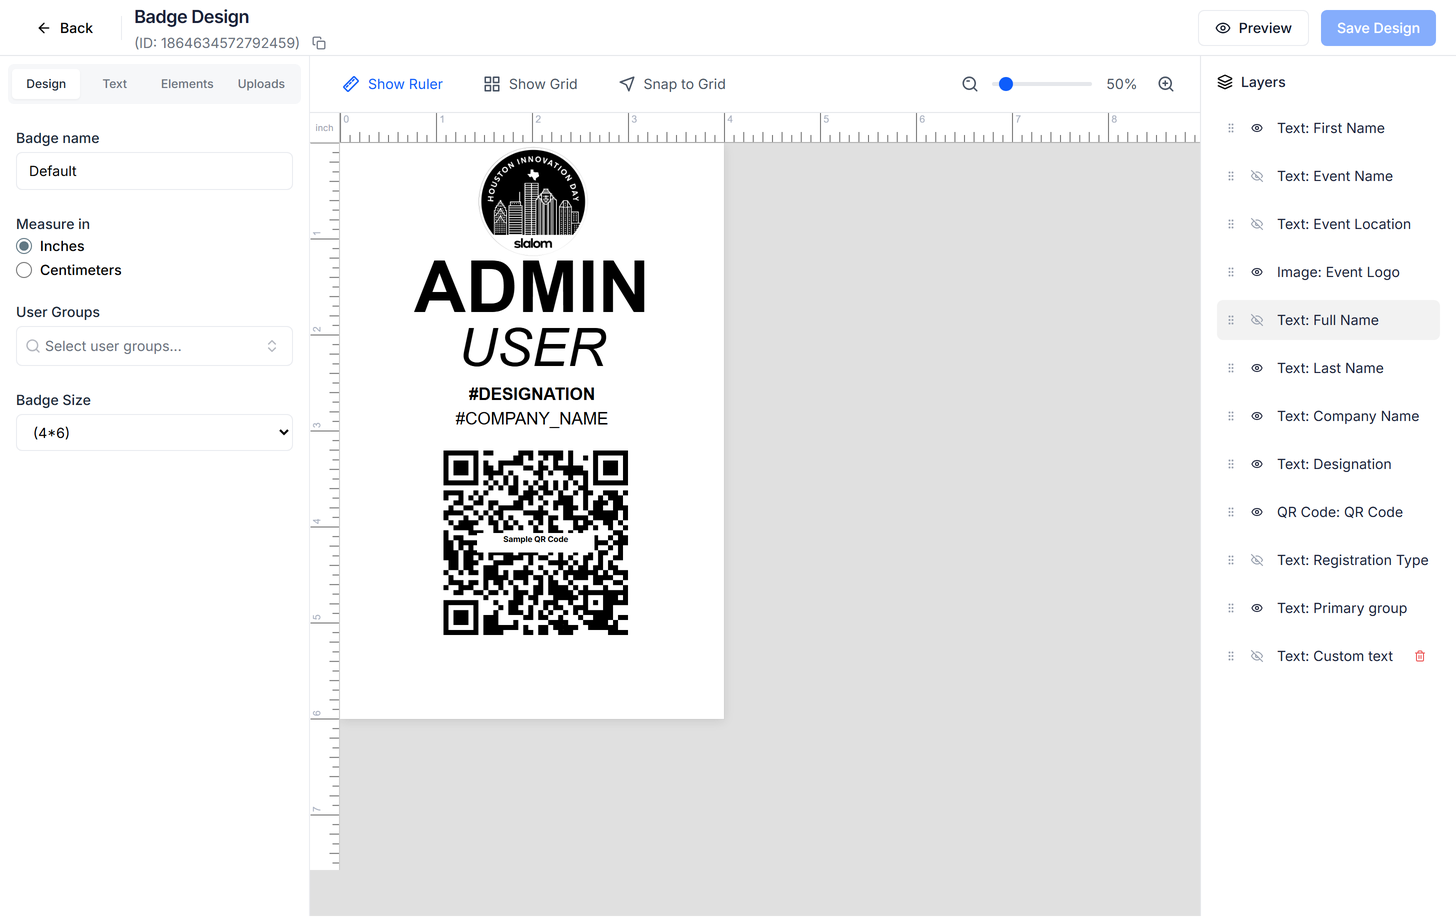
4: Add/arrange elements & layers, style text, and insert registration-form variables
5: Save your badge design
6: Click "Select Attendee & Generate", choose paper size, and generate badges
🔔The default badge gives a common design for all user groups. You can design a single style for all or have specific layouts for individual groups.
Additional Tips:
- Design for Readability: Ensure the text on the badges is clear and easy to read from a distance.
- Consider Badge Size: Choose an appropriate badge size that is comfortable for attendees to wear.
- Test Printing: Print a few test badges to check for any issues with design or printing quality.
- On-Site Printing: If possible, consider using HOST's on-site badge printing feature for last-minute changes or additions.
- We recommend a max of 15 fields on the badge to enable smooth badge generation.
