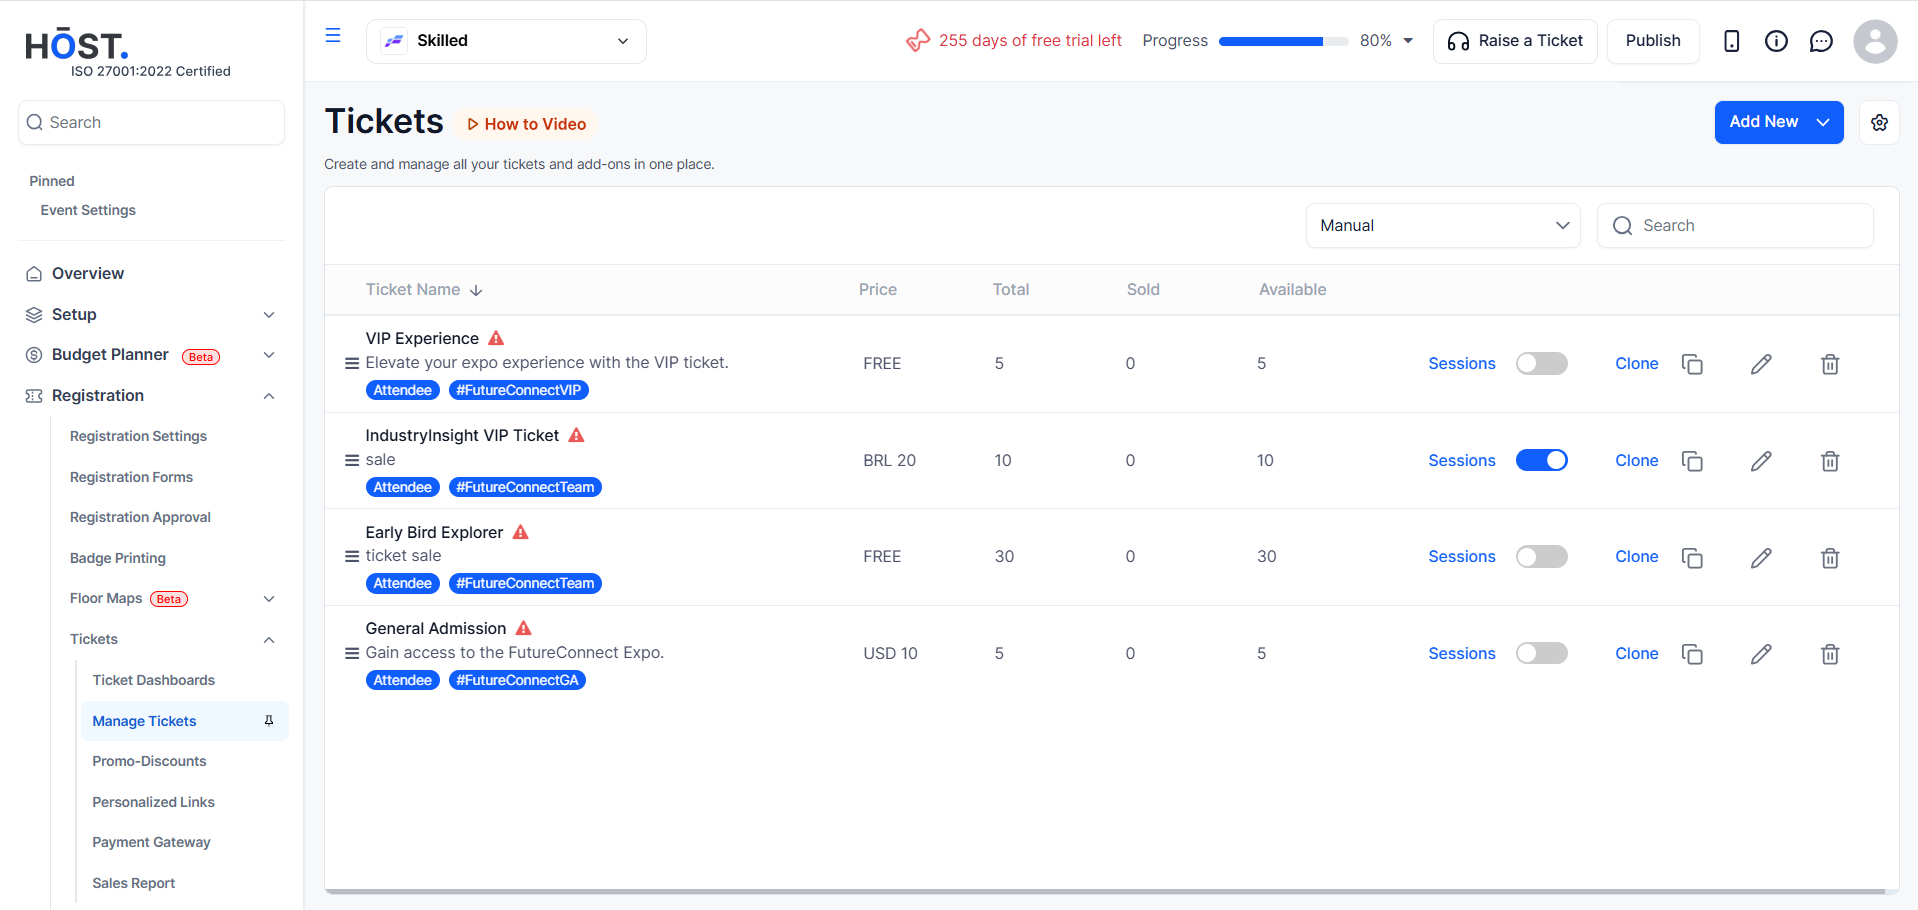
The Manage Tickets section is where you create, configure, and organise all ticket types for your event. Each ticket has its own pricing, capacity, sale window, and visibility settings.
Opening Manage Tickets
Go to Tickets → Manage Tickets in the sidebar.
Click Add New to create a new ticket type.
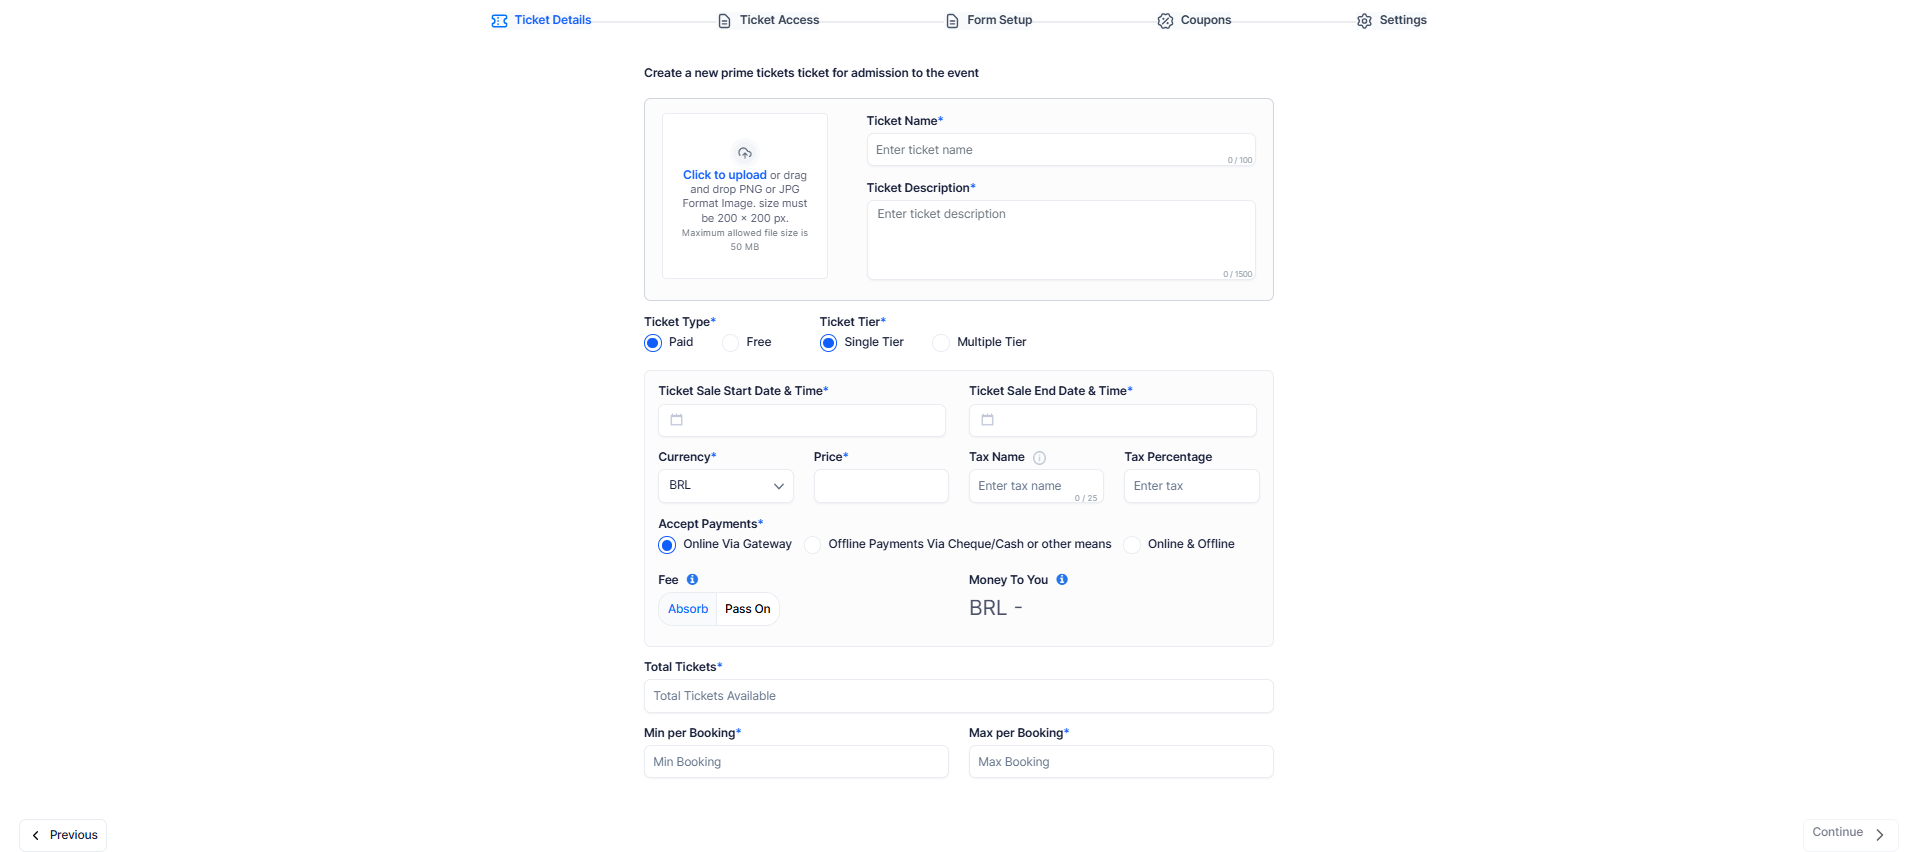
Required Fields
Ticket Name must be unique within your event and supports up to 100 characters.
Ticket Description provides details about what the ticket includes and supports up to 1500 characters.
Ticket Type can be set to Paid or Free, and selecting Free will hide all pricing-related fields.
Ticket Tier allows you to choose between Single Tier and Multiple Tier depending on your pricing structure.
Ticket Sale Start Date and Time defines when the ticket becomes available, while Ticket Sale End Date and Time must be set later than the start date.
Currency is required when the ticket type is Paid and must be selected from supported options, and Price is also required for paid tickets and supports decimal values.
Accept Payments lets you choose between online, offline, or both payment methods.
The Fee option allows you to decide whether to absorb the transaction fee or pass it on to the attendee.
Total Tickets specifies the number of tickets available, while Min per Booking and Max per Booking define the minimum and maximum number of tickets a user can purchase per transaction.
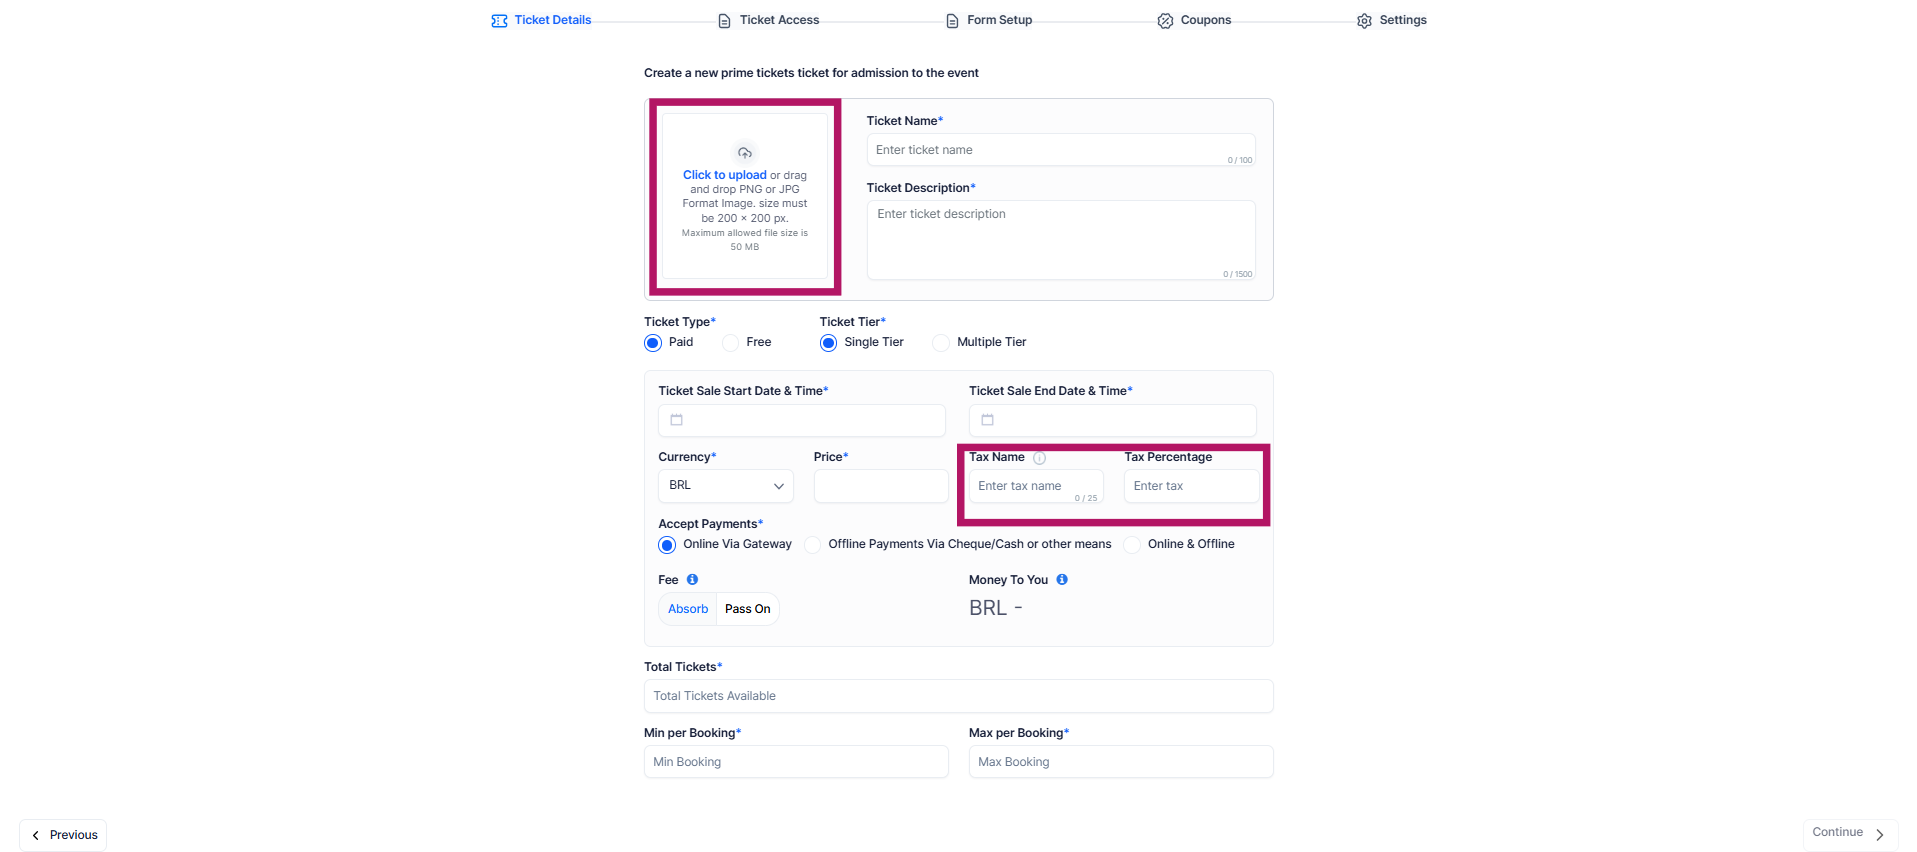
Optional Fields
The optional fields include Tax Name and Tax Percentage, which can be used to define any applicable tax on the ticket price. Additionally, the Ticket Image upload is optional and allows you to add a visual representation for the ticket.
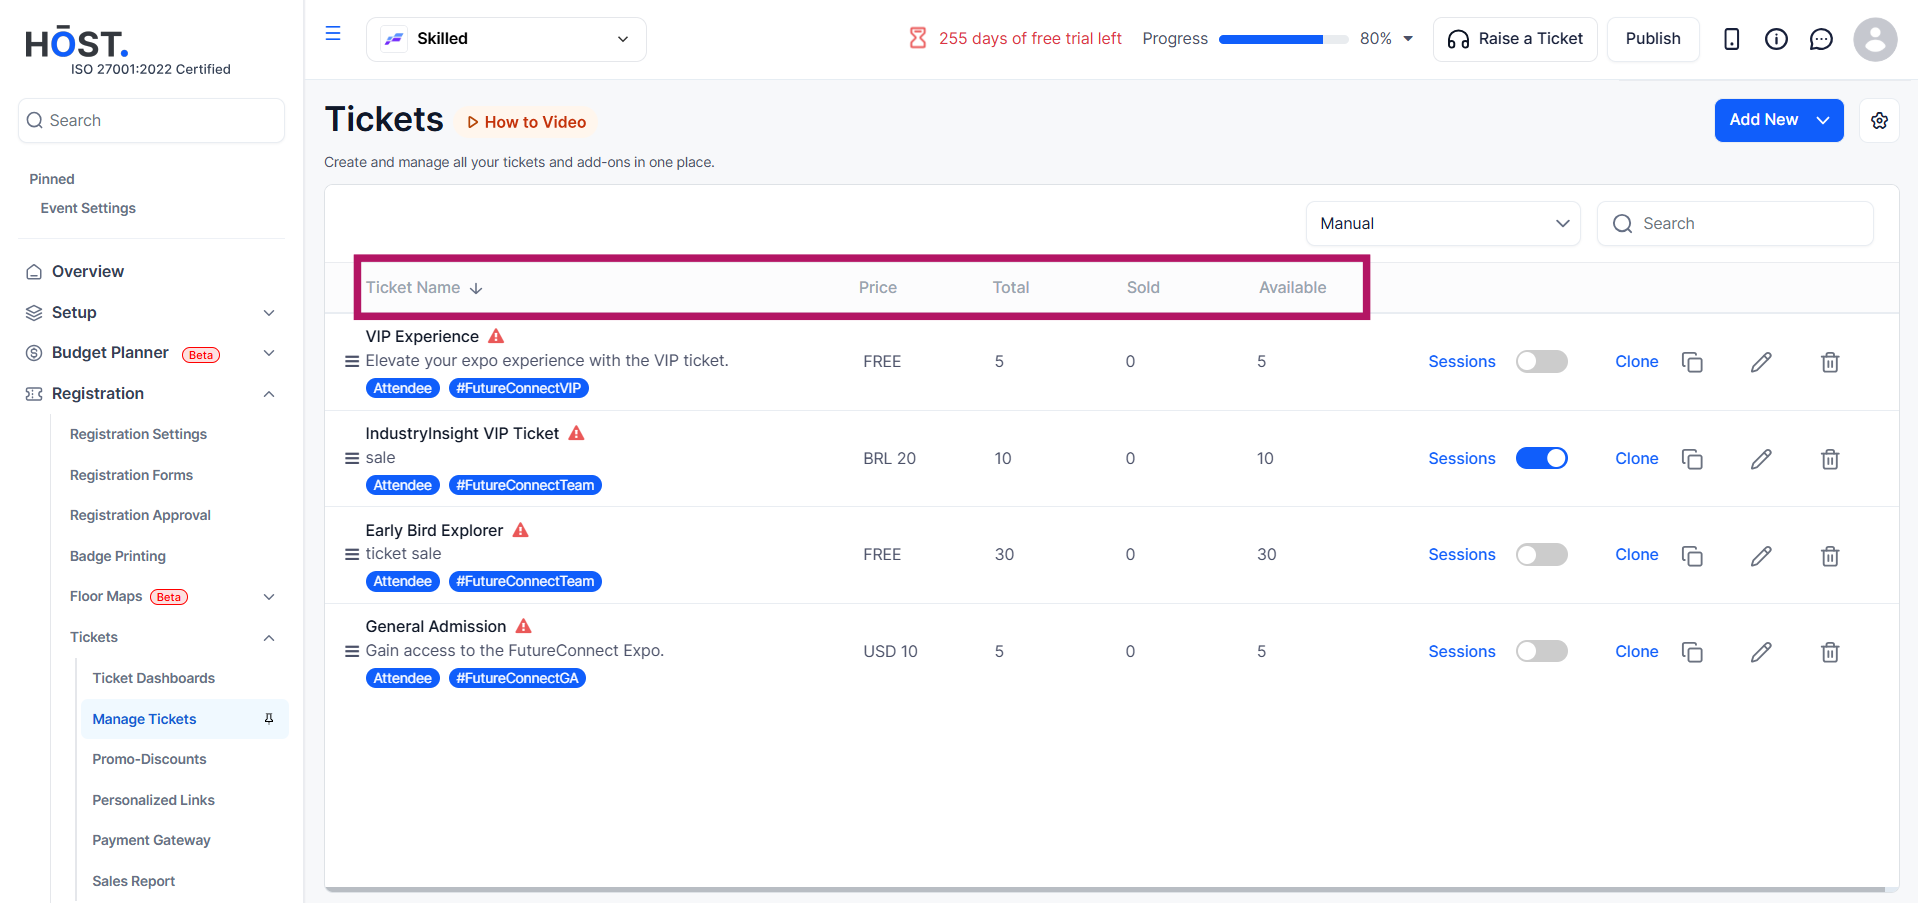
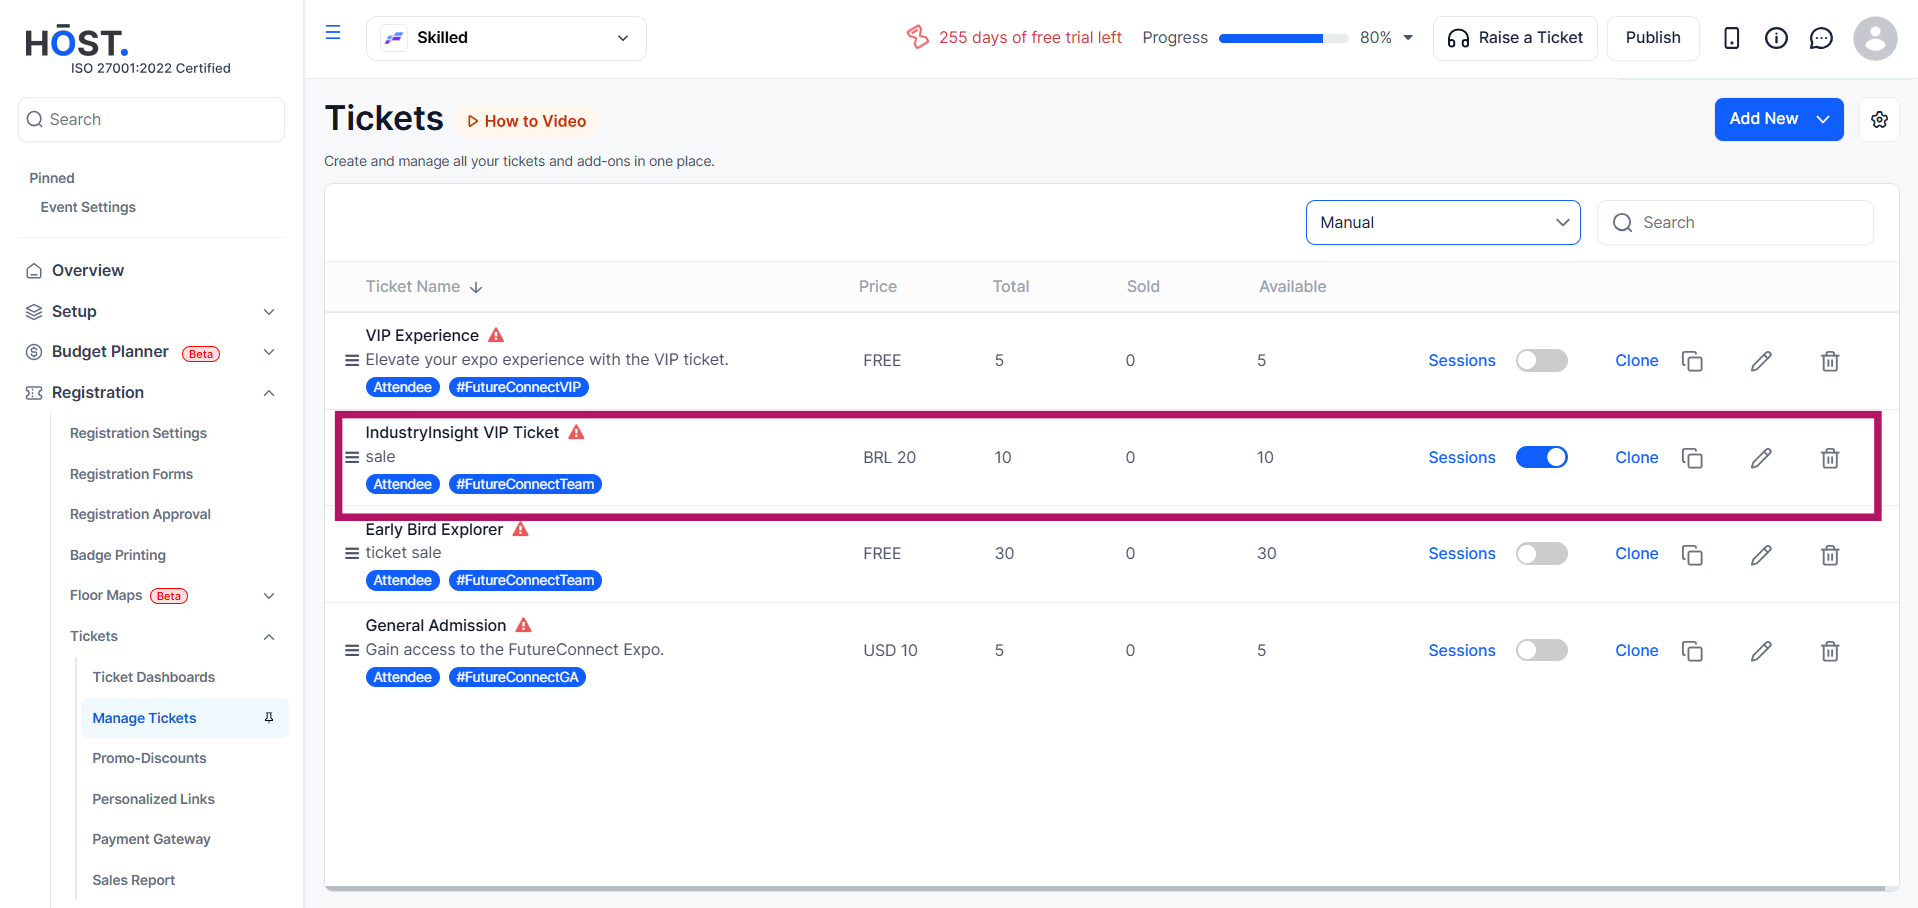
Ticket List
Each ticket row in the list shows: Name, Price, Total, Sold, and Available.
Visual warning indicators appear when: the sale period has ended, tickets are sold out, a paid ticket has no payment gateway connected, or the ticket is disabled/hidden.
Actions Per Ticket
Each ticket row provides quick actions:
Sessions toggle – Enable or disable session mapping for the ticket
Clone – Duplicate the ticket with the same configuration
Edit (pencil icon) – Modify ticket details
Delete (bin icon) – Remove the ticket
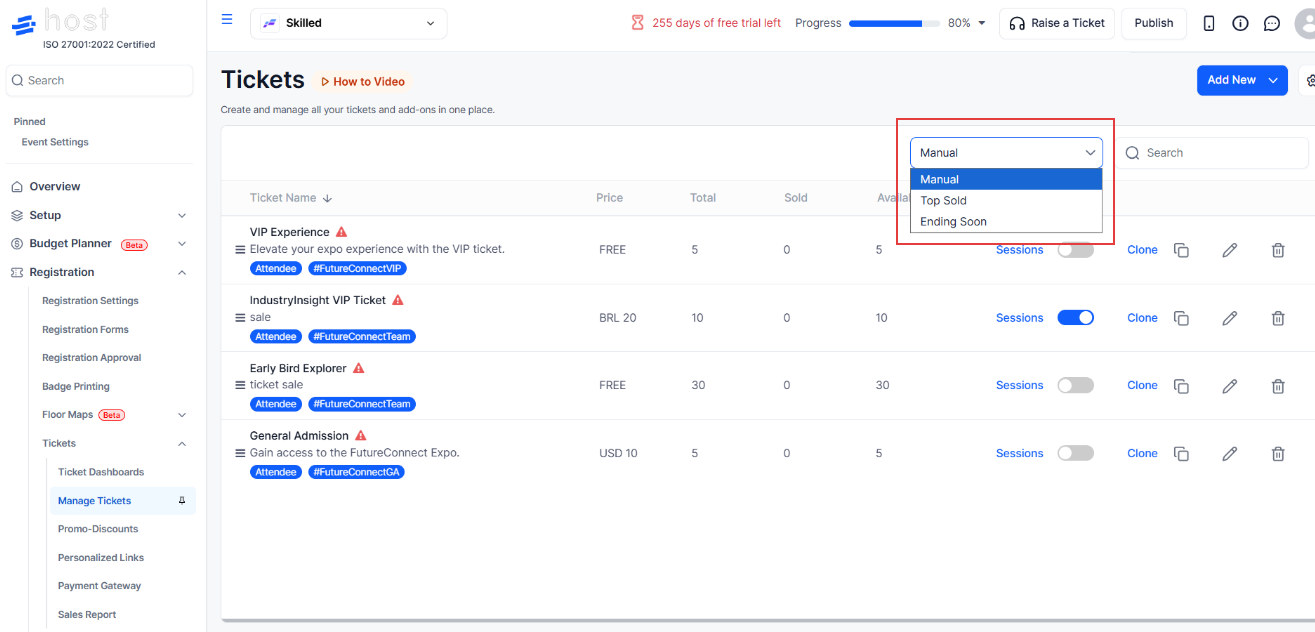
Sorting the Ticket List
You can reorder how tickets appear to attendees using these sort options:
You can control how tickets are displayed by using the sorting dropdown available at the top of the ticket list. The available options include:
Manual – Displays tickets in the order you have arranged them. You can reorder tickets by dragging them using the handle icon next to each ticket name.
Top Sold – Automatically sorts tickets based on the number of tickets sold, with the highest-selling tickets shown first.
Ending Soon – Prioritises tickets whose sale end date is approaching.
Validations
The system enforces several validations to ensure tickets are configured correctly:
Ticket Name must be unique within the event
Sale End Date must be after the Sale Start Date
Price must be entered for paid tickets
Currency must be selected for paid tickets
Max per Booking must be greater than or equal to Min per Booking
Total Tickets must be greater than zero
Payment method must be selected for paid tickets
If any required field is missing or invalid, the ticket cannot be saved.